How to Make a Vinyl Figure: A Step-by-Step Look Inside a Real Production Line
Knowing how to make a vinyl figure is a surprisingly specialized skill. If you've ever held an art toy, a designer collectible, or a blind-box figure and wondered what actually went into making it — not the design, not the packaging, but the physical act of making it — this is that article. It's not injection molding. It's not 3D printing. Learning how to make a vinyl figure means understanding a chain of mostly manual steps — steps that start with a bucket of chemical paste and end with something you'd put on a shelf.
It Starts With a Bucket of Slop
The first thing to understand about how to make a vinyl figure is the raw material. It isn't plastic pellets you can pour out of a bag. It's a liquid — a thick, paste-like slurry called plastisol, made by mixing PVC powder with plasticizers and a handful of chemical additives. That paste is the starting point for how to make a vinyl figure, and everything downstream depends on getting it right. The main plasticizer is usually DINP oil, which keeps the finished figure soft and flexible at room temperature. Some factories also add a secondary plasticizer called TXIB — it makes the paste easier to work with at lower temperatures, but it's more expensive and more volatile, so most factories keep it at 10–20% of the plasticizer blend.
Beyond the base oils and PVC powder, the paste needs stabilizers. Without stabilizers, PVC releases hydrochloric acid gas during heating, which destroys the material from the inside. The paste also needs a color pigment, which gets pre-ground in a three-roll mill before being stirred in. Getting the color consistent across batches is one of the more underrated challenges in how to make a vinyl figure. After all the ingredients are mixed — a process that takes 30–50 minutes in a large industrial mixer — the paste gets pulled into a vacuum chamber. The vacuum draws out all the trapped air and moisture. If you skip it, every figure comes out riddled with tiny bubbles just under the surface. Every factory guards their exact formula. The ratio of PVC powder to oil controls hardness. Get it wrong and your figures come out either squishy like a stress ball or hard and brittle.
Copper Molds: Why Vinyl Figures Are Expensive
Molds are the single largest upfront investment in how to make a vinyl figure, and they're non-transferable between designs. Vinyl figure molds are made from copper, not the steel or aluminum you'd use in injection molding. They're built through electroplating: a wax model gets coated in conductive spray, submerged in a copper sulfate bath, and slowly plated with copper over several hours. One millimeter of copper takes roughly 8–10 hours to plate. A finished mold is typically 1.5mm thick.
The full mold development process follows a precise sequence: a sculptor makes a clay prototype by hand, then the clay master gets cast in silicone to create a flexible negative mold. The silicone mold gets filled with wax — and the wax model must be made 1.08× larger than the intended figure to account for PVC shrinkage during curing. The wax model gets electroplated with copper to create the master mold. Vinyl parts are pulled from the master mold to create intermediate rubber skins at 1.06× size. These skins get electroplated again to produce the production molds at 1.03× size. By the time you have working production molds, you've built multiple generations of tooling. Lead time for a new mold set is typically 3–6 weeks minimum. Cost runs into thousands of dollars before you've poured a single drop of plastisol.
One more thing: the copper surface oxidizes and reacts with PVC paste at high temperatures, releasing copper chloride, which discolors the figures. The fix is to plate a thin layer of nickel over the copper. That nickel layer wears down over time and eventually needs to be replated — a recurring maintenance cost that anyone planning how to make a vinyl figure needs to budget for from day one.
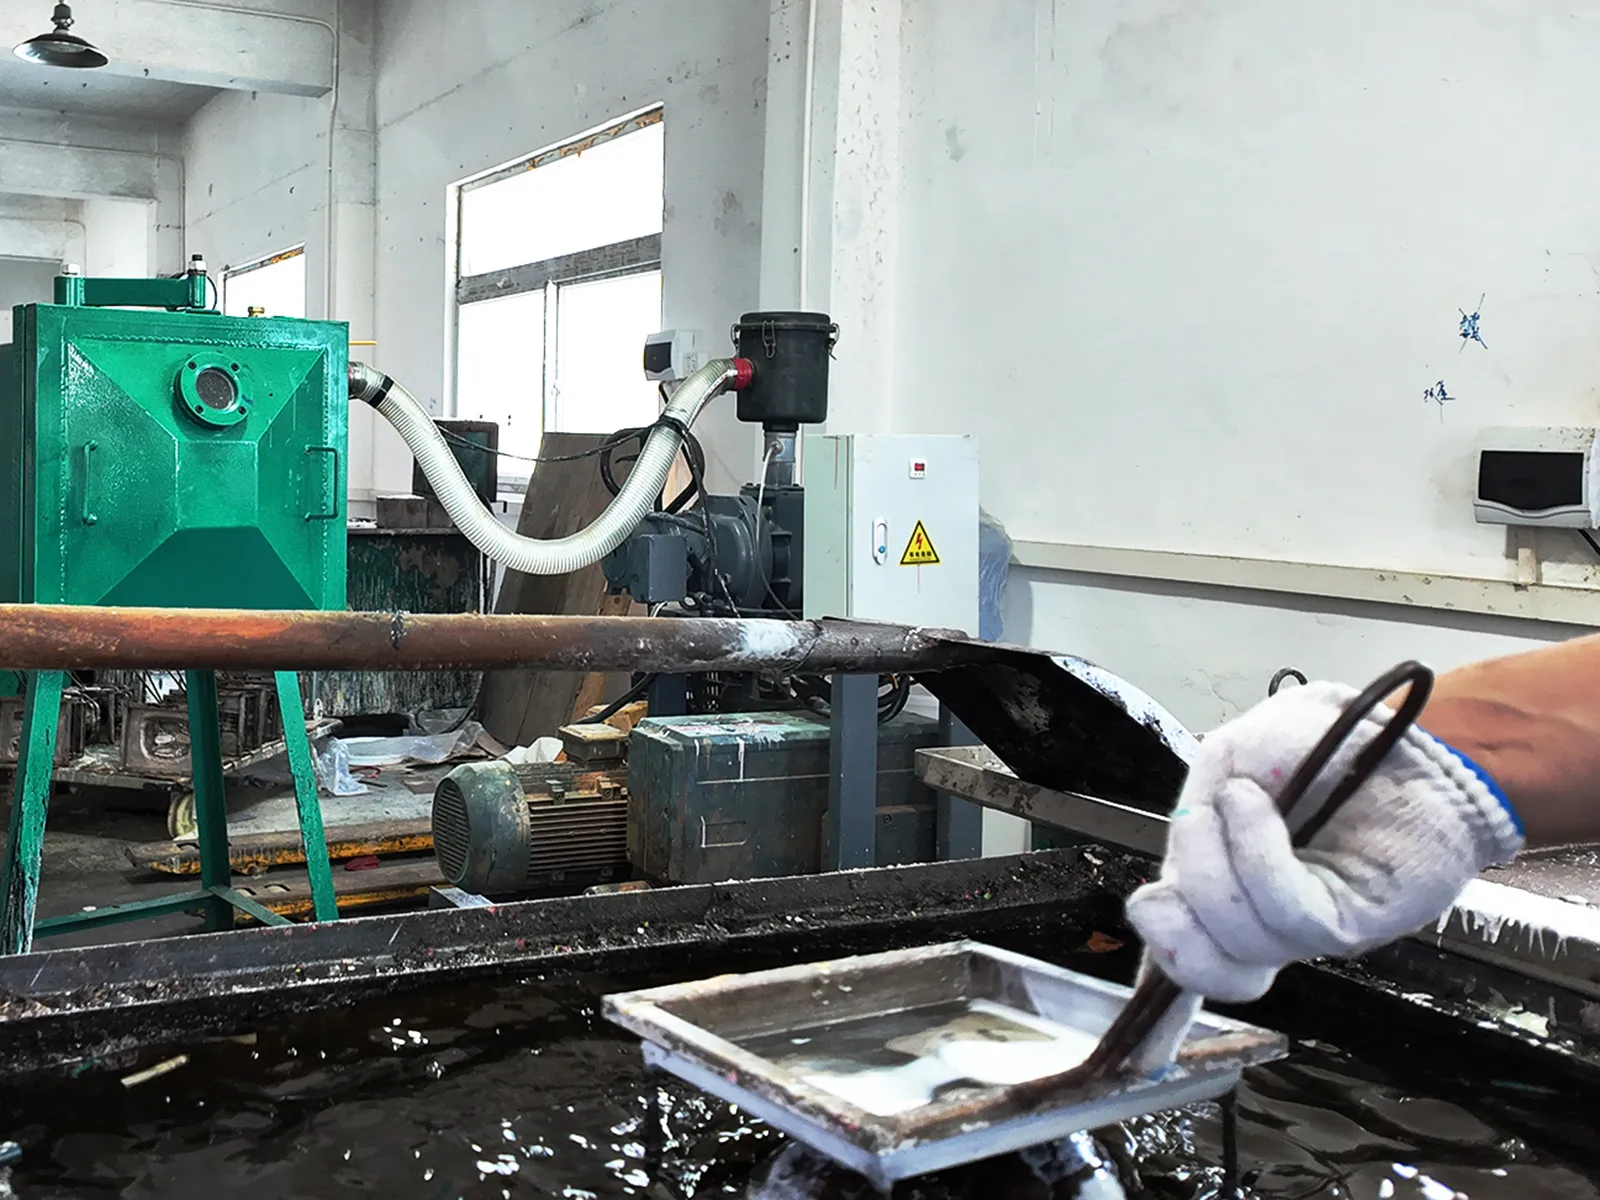
The Rotocasting Furnace
Now we get to the actual casting — the step most people think of when they think about how to make a vinyl figure. The core process is called rotocasting (or slush casting). A worker fills each copper mold with a measured amount of plastisol from a dispensing gun. The weight is preset — overfill and you get thick, heavy parts that are hard to demold; underfill and you get thin walls with weak spots that tear when you pull them out.
Once filled, the mold caps get locked shut. Multiple molds are mounted onto a circular iron rack called a plate, which then gets loaded into the rotocasting furnace. The furnace runs at 250–280°C. While the heat is on, the entire plate of molds rotates 360 degrees continuously. The spinning distributes the liquid paste evenly across the inside surface of every mold — this even distribution is what makes rotocasting the right method for producing hollow vinyl figures with complex outer shapes. After roughly two minutes of heating, the PVC sets from liquid into solid form. The molds come out of the furnace and go straight into a water bath for cooling.
In a typical production setup, a factory runs three plates in rotation: two in the furnace, one outside being unloaded and reloaded. The cycle time is 180–240 seconds per plate. With twelve molds per plate and a 22-hour production day, a single furnace can output nearly 4,000 figure parts per day. Demolding is done entirely by hand — there are no ejector pins. A worker opens the mold cap, grabs the edge of the soft figure with pliers, and physically pulls it out, peeling the vinyl away from the copper surface like pulling a sock off. Copper mold surfaces scratch easily; the pliers go on the part, never on the mold. After demolding, some figures come out warped from thermal stress. They go into a 100°C oven for about 20 minutes to relax back into their correct shape, then excess material gets trimmed off with a blade. What you have now is a blank.
Spray Painting: Where the Blank Becomes a Character
What comes out of the furnace is a blank: a plain, flesh-colored or white vinyl shell. The next phase of how to make a vinyl figure is adding the surface decoration — colors, face details, costume elements — that transforms a blank into something that looks like a character. The painting area of a factory that knows how to make a vinyl figure is more pharmaceutical than artistic. Humidity is controlled. Ventilation extracts solvent fumes. Workers wear respirators.
Paint has to match the substrate — soft PVC and rotocast figures require soft-formulation paints that can flex without cracking. Hard-substrate paints applied to a vinyl figure will crack and peel the first time anyone bends an arm or squeezes the figure's head. Spraying is done through custom copper jigs called spray masks. Each mask is electroplated to match the exact contours of the figure. The spray sequence matters: interior areas get painted first, then exterior. Lighter colors before darker colors. Air pressure runs at 4.0–4.5 × 10⁵ Pa. Paint overspray is significant — factories typically recover only 50–60% of the paint sprayed. Every batch gets pulled for adhesion testing: score the painted surface in a grid pattern, stick 3M tape over it, and rip it off at a 45-degree angle. If more than 5% of the paint pulls off, the batch fails.
Hair Rooting: The Part Nobody Talks About
For figures with rooted hair — dolls, chibi figures, some art toys — there's an entire sub-process that most guides on how to make a vinyl figure ignore completely. It's also one of the most labor-intensive and skill-dependent steps in the whole production chain. Hair rooting is done by a worker operating a rooting machine. The machine holds a bundle of nylon fiber in a needle. The needle punches through the head's vinyl surface and pulls a small loop of fiber through, then reverses and locks it in place. The worker moves across the entire scalp section by section, punching thousands of individual loops.
Needle selection is critical: fine needles (size 70–80) work for small heads; heavier needles (size 90–100) for larger figures with thicker fiber. If a needle breaks during rooting — which happens — every fragment has to be accounted for. The finished figure goes through a metal detector before leaving the rooting station. After rooting, the head goes through a setting process: either 70–80°C dry heat for 25–45 minutes, or steam at 105–125°C. This locks the hair fibers in place. Then a worker trims and combs the hair by hand, giving each figure something that functions like a haircut. You cannot automate this. A worker who does this all day develops muscle memory for consistent depth and density — that hand-finishing touch is part of what makes how to make a vinyl figure fundamentally different from producing a mass-market plastic toy.
Assembly and Quality Control
After painting and any hair work, the parts get assembled. Heads, bodies, limbs, accessories — each part was rotocast separately and now they come together. Assembly methods depend on the figure design: some joints use metal screws or pins, some are friction-fit soft vinyl connections, and some figures have sewn cloth elements with fabric costumes. Final inspection looks for: color deviation from the reference sample, paint adhesion failures, surface defects (bubbles, creases, scorch marks), dimensional accuracy, and joint function. Any figure that doesn't pass doesn't ship. Every shortcut taken upstream shows up here.
What Actually Makes This Hard
Every single stage in how to make a vinyl figure depends on workers with specific tactile skills. The paste-mixing operator knows by feel and viscosity whether a batch is right. The rotocasting operator can tell from the weight of a demolded part whether the wall thickness is off. The spray technician knows from the sound of the air compressor whether pressure is dropping. The hair-rooting worker can feel when a needle is about to break. These micro-judgments are what separate a good production run from a failed one, and they're not in any manual.
You can automate some of this. You cannot automate all of it — not yet, and not cheaply. That's why the barrier to entry for making quality vinyl figures is high. It's not equipment cost. It's accumulated know-how — in the hands of the people doing the work, not in the process documents or machine settings. Every factory that consistently knows how to make a vinyl figure right has spent years building those hands. The skill is in the hands, not the machines. That's how to make a vinyl figure. And that's why the ones worth buying aren't cheap.