How Are Vinyl Toys Made: A Factory-Floor Journey From Powder to Shelf
Walk into a vinyl toy workshop in Dongguan on any given morning and the first thing that hits you is the smell — warm PVC, solvent, and something faintly metallic. Workers in blue aprons are already elbow-deep in the process, and if you have ever wondered how are vinyl toys made, this is where the real answer lives. Not in a textbook diagram, but in the noise, heat, and rhythm of a production line that has barely changed in forty years.
Two Roads, One Material
Before we get into the weeds, it helps to understand something fundamental. When people ask how are vinyl toys made, they often expect a single answer. There is not one. PVC — the polymer at the heart of almost every soft vinyl figure — can be shaped in two very different ways: injection molding for hard-shell parts, and slush molding (the industry calls it tang-jiao) for hollow, squeezable bodies. Most collectible vinyl figures use both. The head, hands, and feet come off a slush-molding line; the torso frame, gears, or internal brackets come off an injection press. Figuring out how are vinyl toys made means understanding both paths and where they converge.
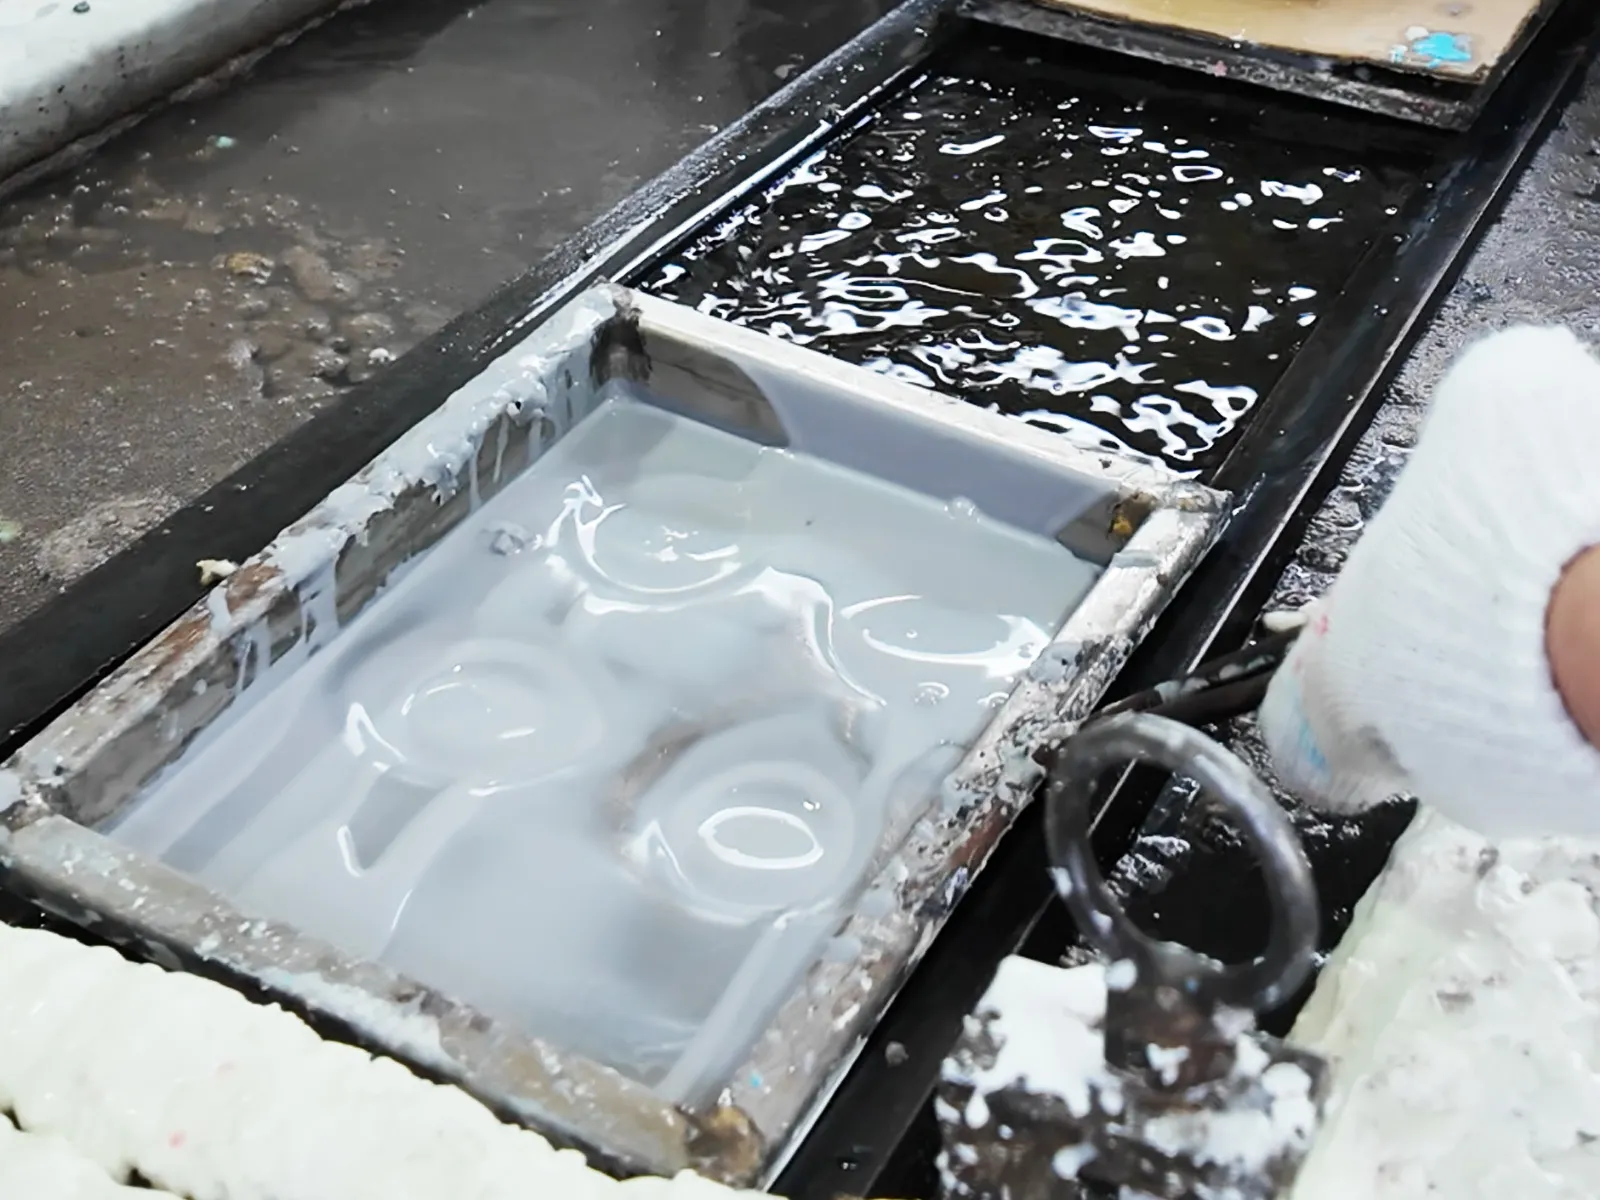
Step 1 — The Slurry That Starts Everything
Every slush-molded vinyl piece begins as a bucket of liquid slurry. The base is PVC resin powder — two grades, actually: coarse and fine. Mixed into it go plasticizers (DINP oil for flexibility, TXIB oil to speed up curing), heat stabilizers, anti-heat oil, mold-release agents, and pigment paste. A single batch takes roughly an hour in a planetary mixer: slow stir for fifteen minutes, scrape the blades, add the rest of the powder, fast stir for forty more while the vacuum pump hisses away at 25 inches of mercury, dragging trapped air and moisture out of the goop.
Why the vacuum? Bubbles. If you skip this step, the finished figure comes out pockmarked, and that is the kind of defect a QC inspector catches from across the room. The recipe is guarded, too — every factory tweaks the PVC-to-oil ratio to hit a target Shore hardness, and those numbers are treated like state secrets. If you want to grasp how are vinyl toys made on a fundamental level, start with the slurry: it is the single variable that determines whether the final product feels right in your hand.
Step 2 — Copper Molds, Six Months in the Making
You cannot slush-mold without a mold, and building one is a surprisingly long chain. A sculptor carves a clay prototype from concept art. Silicone is poured over the clay to make a negative. Wax gets cast into the silicone negative, creating a wax master — deliberately oversized by 8 percent to compensate for shrinkage later. That wax master goes into an electroplating bath and emerges as a copper shell, the "mother mold." A first round of slush molding off that mother mold produces a skin called the "seed skin" (1.06× scale), and that seed skin goes back into the plating tank to spawn production molds at 1.03×.
Each production mold is a copper shell lined with a thin nickel skin. The nickel barrier matters: bare copper reacts with hot PVC, releasing toxic copper chloride and discoloring the part. After a few thousand cycles the nickel thins out and the mold needs re-plating. This whole loop — from clay to production-ready copper — can take six to eight weeks, and it explains a big chunk of the cost when people ask how are vinyl toys made and why a twelve-centimeter figure retails for sixty dollars.
Step 3 — Inside the Slush-Mold Oven
Here is where the magic (and the sweat) happens. A worker fills each copper mold with a measured shot of slurry — every figure weight is predetermined down to the gram — snaps the lid shut, and slides the mold onto a circular iron rack. Three racks sit in rotation around a single oven: two inside the furnace heating and tumbling, one outside for unloading, cooling, and refilling. Inside the oven, the racks spin at 360 degrees. Centrifugal force throws the liquid PVC against the mold walls, coating them evenly while the 250-to-280-degree heat cures the polymer.
Two minutes later the rack rolls out, takes a five-second dunk in a water tank, and a worker pops the lid, vents the steam, and pulls the still-warm vinyl skin off the mold by hand. It takes strength and feel — yank too hard and you tear the part, too soft and it sticks. If you want to know how are vinyl toys made at scale, the math is revealing. Twelve molds per rack, one rack every four minutes, twenty-two hours per day: that is close to four thousand pieces per oven per day. A medium factory might run eight ovens simultaneously.
Step 4 — The Reshape Oven and Gate Removal
Fresh out of the mold, vinyl parts are rarely picture-perfect. The pulling and cooling distort them. A reshape oven — essentially a low-temperature kiln at roughly 100 degrees Celsius — relaxes the PVC back into its intended shape over twenty minutes. After that, a worker trims the "gate," the little nub of excess material where the slurry was poured in, using a curved blade. Sloppy trimming leaves a visible scar; over-trimming gouges the figure. This is hand-skill work, not automation, and it is one more reason why understanding how are vinyl toys made means appreciating the human hands behind every piece.
Step 5 — Injection Molding for Hard Parts
While the slush-mold line handles the soft, hollow pieces, injection presses crank out the rigid components. Granular ABS or PP pellets tumble into a hopper, get dried at 80 degrees for two hours, and then melt inside a heated barrel at 200 to 240 degrees. A screw rams the molten plastic into a steel mold under pressures up to 150 megapascals. The mold clamps shut with several hundred tons of force, the plastic cools for ten to twenty seconds, the mold opens, and a robotic arm pulls the part out.
Injection molding is fast — cycle times under thirty seconds — but the tooling is expensive. A multi-cavity steel mold for a torso frame can cost tens of thousands of dollars and take three months to build. Common defects on the injection side include short shots (incomplete fill), flash (material squeezing past the mold seam), sink marks over thick sections, and weld lines where two flow fronts meet. Experienced technicians tweak temperature, pressure, and speed one variable at a time — change two simultaneously and you lose track of cause and effect.
Step 6 — Paint: Where the Figure Gets Its Soul
An unpainted vinyl figure is just a pale, rubbery blank. The paint department is where it comes alive, and in the toy industry that still means hand-spraying. A worker fits a copper stencil — electroformed to match the exact curve of, say, a figure's cheek — over the part, holds a spray gun at roughly thirty centimeters, and applies a thin, even coat. Each color is a separate pass with its own stencil. A single figure might need eight or ten masking operations: flesh tone base, eye whites, iris color, lip tint, hair shadow, cheek blush, and so on. Paint viscosity is checked with a flow cup (fifteen to twenty-six seconds is the typical range), and air pressure stays between 0.35 and 0.7 megapascals.
Understanding how are vinyl toys made means understanding that paint is where most rejections happen. A fleck of dust lands on wet paint and you get a visible bump. Humidity shifts and the paint blushes white. The wrong solvent softens the PVC substrate and the figure literally melts under the coating. QC inspectors on the paint line check color against a signed sample every two hours, run adhesion cross-hatch tests every shift, and reject anything with runs, sags, or bare spots.
Step 7 — Pad Printing for the Fine Details
Eyes, logos, tiny text — anything too small or too precise for a spray gun gets pad-printed. A steel cliché holds the etched artwork. Ink fills the etched recesses; a squeegee scrapes the surface clean. A silicone pad presses down, picks up the ink from the cliché, swings over, and stamps it onto the curved vinyl surface. Getting the ink transfer right is one of the most finicky parts of the process. The ink needs to be dry enough to release from the pad but wet enough to adhere to the PVC. Temperature, humidity, ink viscosity, pad hardness, and dwell time all have to be in balance. A figure with a misprinted eye goes straight to the rework bin — solvent wash, dry, re-print.
Step 8 — Hair and Assembly
For character figures — dolls, anime collectibles, pop-culture icons — the hair is a process unto itself. Nylon or synthetic fiber is stitched row by row into the vinyl scalp using a root-embedding machine. The tool punches a folded strand through the PVC wall and hooks it on the inside so it cannot pull out. A single head might take hundreds of punches, each one a potential defect if the needle angle is off. After implantation the hair is styled, trimmed, and sometimes heat-set. Final assembly snaps or glues the head, limbs, and torso together. Electronic figures get a PCB, speaker, and battery compartment wired in before the shell closes. A last round of QC checks dimensions, paint adhesion, joint tightness, and function before the figure is bagged, boxed, and palletized.
So how are vinyl toys made? Through a chain of processes — slurry mixing, copper-mold electroforming, centrifugal slush molding, precision injection, hand-masked spray painting, micrometer-level pad printing, needle-by-needle hair implantation, and meticulous final assembly — each one dependent on the one before it. It is a craft that blends chemistry, metallurgy, mechanical engineering, and old-fashioned handwork, refined on factory floors across southern China for decades. The best figures are the ones where you cannot see any of the effort, where the seams vanish, the paint is razor-crisp, and the only thing you notice is the character staring back at you from the shelf.